Project configuration
On this screen, you can edit the basic details of the project and the visual appearance of the course.
Name
The name enables you to identify the project in the list of projects and, also, it will be shown as the title on the course’s cover and as the heading in the table of contents. You can modify the name of your project directly by clicking on the title or by clicking on the side button. You may also do it in the Configuration, Distribution, and Removal sections of My projects' menu.

Cover Image
Like the name, the cover image has a double function; firstly, it lets you identify the project in the list of projects, and secondly, for Classic courses, it acts as a cover for the course and as a heading in the table of contents.
We recommend you use a purely decorative image with no text. Bear in mind that there are many device sizes, and your course image may be cropped.

To select the course image, click on the camera button found in the bottom left-hand part of the image field.
Once the course image has been established, you can remove it with the trash button, on the right of the element, or replace it with another image by clicking on the camera button again.
Cover mode
You can choose the cover mode that best suits the objective of your course. There are three modes: Classic, No cover, and Side panel.

For Express courses this element of the course will not be configurable, since in this format the content is shown directly without a cover.
Logo

In Express courses, this element of the course will not be configurable, since it won’t be visible to the user.
Product personalization
You have two different styles to personalize your course:
- Color: Indicate a color, and we will customize the color palette based on your preferences. The interface of your course will be personalized with a full range of colors, the ones you have chosen, without having to worry about a thing. Easy, right?

Template colours
Also, if you use the template colours you won't have to worry if you change palette thanks to the Smart Colors.
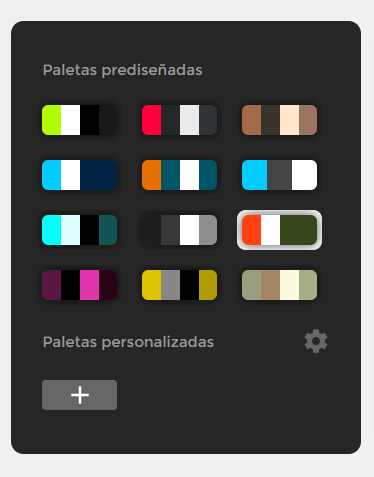
From here you can see the palette you currently have applied in your project, select another one or create a custom palette (if you have a Business or Enterprise account). However, we recommend you to do it from the slide editor so you can see how the palette looks live. We recommend you read the article about Smart Colors to learn more.
- Image: With this customization option, we will show the image you select as a background for the course. The other elements in the interface will have neutral tones to ensure all the text is readable and to give your background image the spotlight.
Accessibility
This setting allows your students to activate an accessible mode in the course and displays contextual suggestions in the slide editor to improve the accessibility of the content.

You can find more information about the Accessibility options in this category.
Course language
You may export your course in different languages. The language you select in this configuration will be used for elements of the course interface, such as buttons and instructions. You can export in Basque, Brazilian, Bulgarian, Burmese, Catalan, Croatian, Czech, Danish, Dutch, English, Finnish, French, Gaelic, Galician, Georgian, German, Greek, Haitian, Hindi, Hungarian, Indonesian, Italian, Japanese, Khmer (Cambodian), Korean, Lithuanian, Malay, Mandarin Chinese, Norwegian, Polish, Portuguese, Romanian, Russian, Serbia, Slovakian, Slovenian, Spanish, Swedish, Thai, Turkish, Ukrainian, Valencian and Vietnamese.
Course navigation
The navigation mode will pinpoint students the order we want it to be read and the obligatory nature of the elements that are inside the slide. For more details, see the specific article.
In Express courses, the type of browsing is not configurable. By default, it will be free vertical browsing.
If your project is set to Accessible Mode, when the user/student activates the accessible experience, locks are removed to provide a better user experience.
Content Font
You can choose the typeface you prefer for titles and text. You can see how in the typefaces article.
End notice
You have the option to show your users an end notice once they have completed 100% of the course. To configure it, activate the button in the project tab and indicate the text you want to be displayed in that window. If the course is published with isEazy Author Go and the Certificate of achievement is enabled, an icon allowing the download will show.

Certificate of achievement
This option is only available for isEazy Author Go. Provided that the option of issuing certificates of achievement is enabled in the platform customization area, it will be possible to activate the certificate for the course under edition.
You can choose whether the grade will be in the Certificate of achievement, you can also set a period of validity starting on the date the course is completed and a personalized description where you may enter the text you want.

Students will see on the isEazy Author Go platform that the ongoing course offers a downloadable certificate of achievement with this icon.

Course description
Here you can type in a summary of the course that will appear in the Course Fact Sheet in isEazy Author Go.

Continue reading Projects Management